


KORE Aviation - The day your CFI signs you off for your first cross country flight changes your whole perspective on flying. Up to this point, everything happened inside the traffic pattern. Short flights. Familiar runways. The same tower frequency every single time.
A cross country flight is a completely different experience. You will be in the cockpit for two to three hours. You will talk to controllers you have never heard before, land at airports you have never seen, and plan fuel burns that actually matter. This is the flight where solid preparation makes the difference between confidence and chaos.
This guide covers everything you need to know before your first cross country flight: what to pack, how to plan your route step by step, what to expect on flight day, and how to choose the right headset for long flights.
What Counts as a Cross Country Flight for Student Pilots?
The FAA definition might surprise you. Under 14 CFR § 61.1, a cross country flight is any flight that includes a landing at a point other than your departure airport, where you navigate using dead reckoning, pilotage, electronic navigation, or some combination of all three. For the flight to count toward your Private Pilot License, the landing point must be more than 50 nautical miles from your departure.
Here is what the FAA requires for your PPL cross country time:
| Requirement | Hours or Distance |
|---|---|
| Dual cross country training | At least 3 hours |
| Solo cross country time | At least 5 hours |
| Long solo cross country | 150 NM total, 3 points of landing, one leg over 50 NM |
| Night cross country (dual) | 1 flight, at least 100 NM total |
Key point: Your first cross country flight will likely be a dual session with your CFI. Think of it as a dress rehearsal. You handle the planning, navigation, and radio calls. Your instructor watches, coaches, and only steps in if needed.
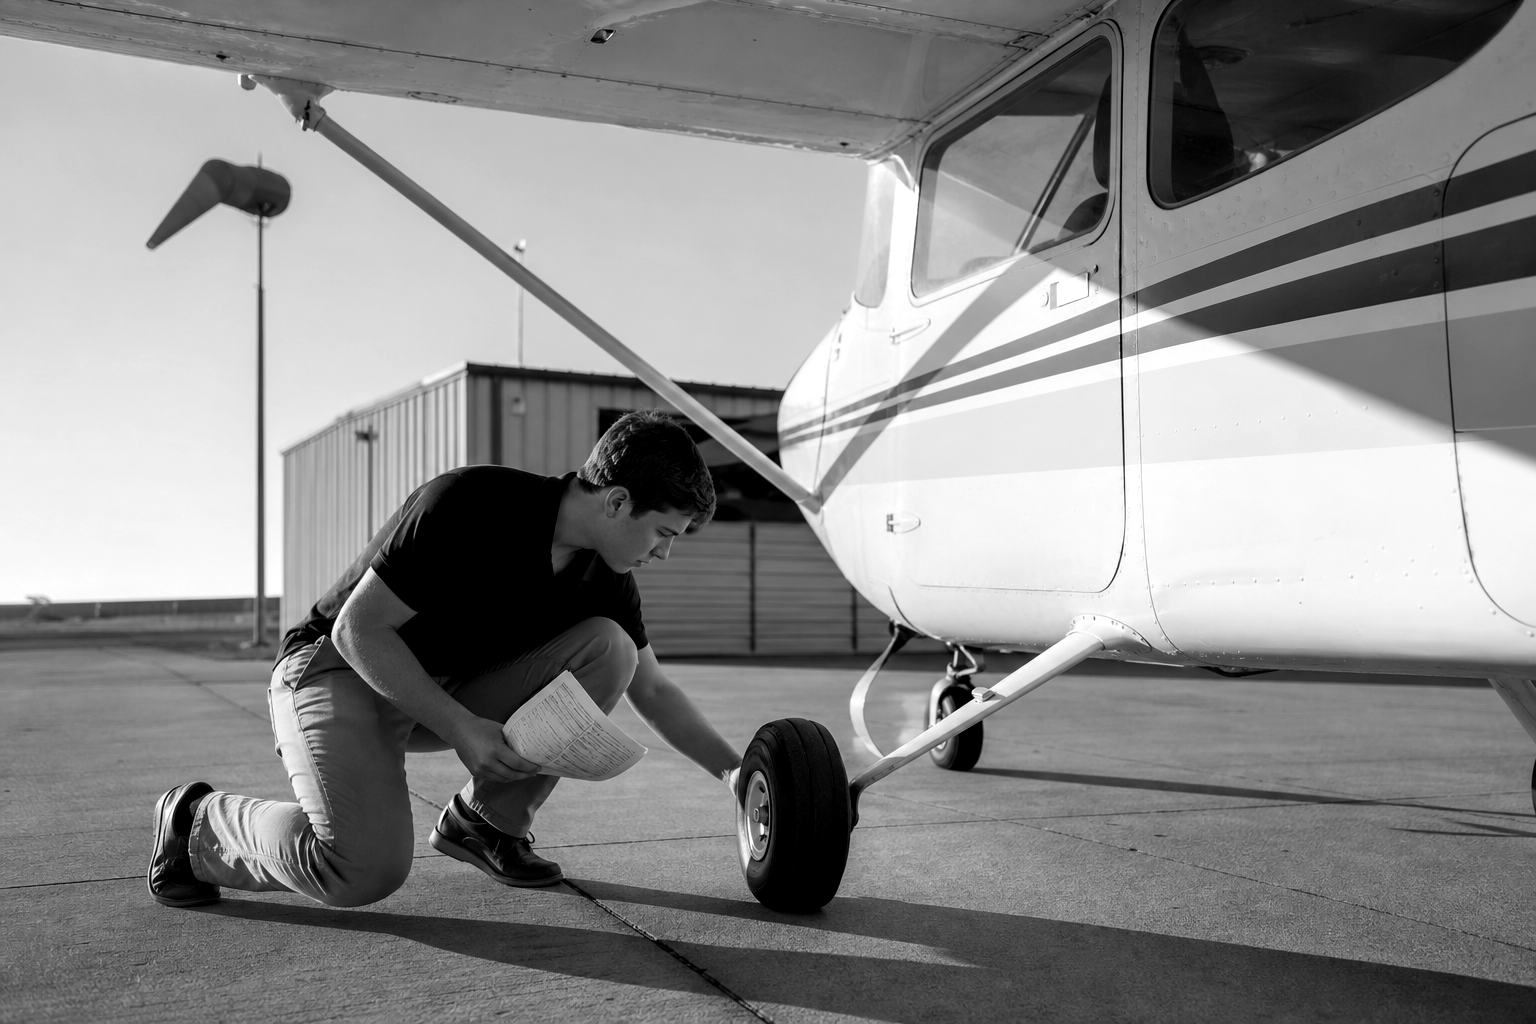
The Complete Cross Country Flight Packing Checklist
A typical pattern session needs almost no gear. A cross country flight is a different story. You will be flying for two to three hours, sometimes longer, and you cannot grab anything you forgot once you leave the ground.
Here is a complete breakdown of what to bring:
| Category | Items | Why It Matters |
|---|---|---|
| Documents | Student pilot certificate, photo ID, current medical certificate, logbook with endorsements | FAA requires all of these. No documents means no flight. |
| Navigation | Current sectional chart (paper), chart supplement, completed nav log, plotter, E6B flight computer | Paper backup is essential even if you use an EFB. Your checkride will test manual planning. |
| Tech | iPad or tablet with ForeFlight or Garmin Pilot, yoke mount, portable battery pack, charging cable | Your EFB is your best friend on a cross country flight, but batteries die. Always bring backup power. |
| Comfort | Water bottle, snacks you can eat with one hand, non polarized sunglasses, lip balm, comfortable headset | Dehydration at altitude is real and sneaks up on you. A two hour flight with the wrong headset will leave you with a splitting headache. |
| Safety | Flashlight with red lens, backup handheld radio (optional), emergency contact info, printed flight plan | Night cross country flights require a flashlight. Always leave a copy of your plan with someone on the ground. |
Pack everything the night before. The morning of your first cross country flight is stressful enough without scrambling for a plotter or a charging cable.
Also read: What to Pack in Your Pilot Gear Bag: A Complete Checklist for 2026
How to Plan Your First Cross Country Flight Route
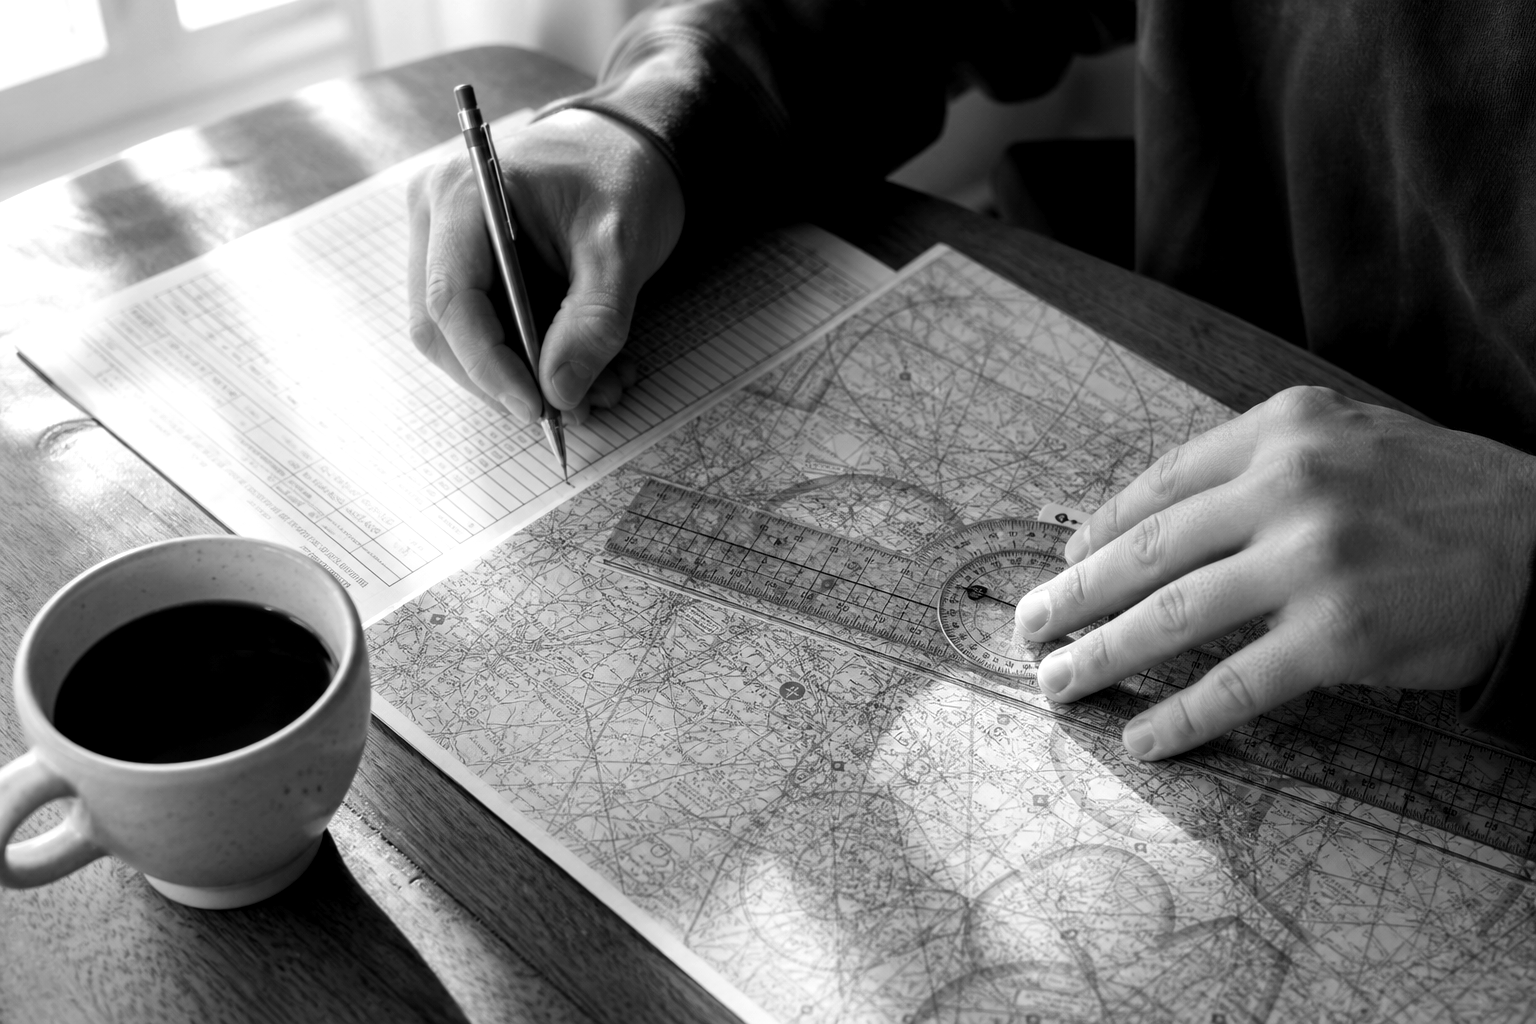 Cross country flight planning is where most students spend the biggest chunk of their prep time. A solid plan makes the whole flight feel manageable. A rushed plan turns it into a stressful mess.
Step 1. Pick Your Destination
Your instructor will likely choose the airport for your first cross country flight. A good first destination has a control tower (so you practice talking to ATC), reasonable runway length, and fuel services available. Towered airports feel less intimidating than you expect. The controllers talk to student pilots every single day.
Step 2. Plot Your Course on the Sectional Chart
Draw a straight line on your sectional chart from departure to destination. Then check what falls along that line:
- Airspace. Will you pass through Class C or Class D airspace? Request flight following early so ATC is already tracking you.
- Terrain. Look at the Maximum Elevation Figures (MEFs) along your route. Plan to fly at least 2,000 feet above them.
- Checkpoints. Pick 4 to 5 visual landmarks that are easy to spot from the air. Highway intersections, lakes, and towns work well. Avoid power lines and railroad tracks because they all look identical from altitude.
Step 3. Get a Weather Briefing
Call Flight Service at 1 800 WX BRIEF or use your EFB for a standard weather briefing. Pay close attention to:
- Winds aloft. These determine your actual ground speed and fuel burn.
- Ceilings and visibility. Check conditions at your destination, not just your home airport.
- NOTAMs, AIRMETs, SIGMETs, and TFRs. Any of these can change your route or cancel the flight.
Step 4. Fill Out Your Nav Log
Your navigation log is the roadmap for your cross country flight. For each leg, calculate:
- True course to magnetic course to magnetic heading (using wind correction)
- Ground speed (using your E6B or EFB)
- Estimated time en route for each checkpoint
- Fuel burn per leg and total fuel required
Pro tip: Add 45 minutes of reserve fuel. The FAA minimum for VFR is 30 minutes, but wind forecasts are often off and you may fly extra minutes looking for an unfamiliar runway.
Step 5. File Your VFR Flight Plan
Filing is optional but smart. If something goes wrong and you do not show up at your destination, search and rescue knows exactly where to look. File through ForeFlight or 1800wxbrief.com. Remember to activate it once airborne and close it after you land.
What to Expect on Your First Cross Country Flight
 You have planned, packed, and barely slept. Here is what the actual flight looks and feels like.
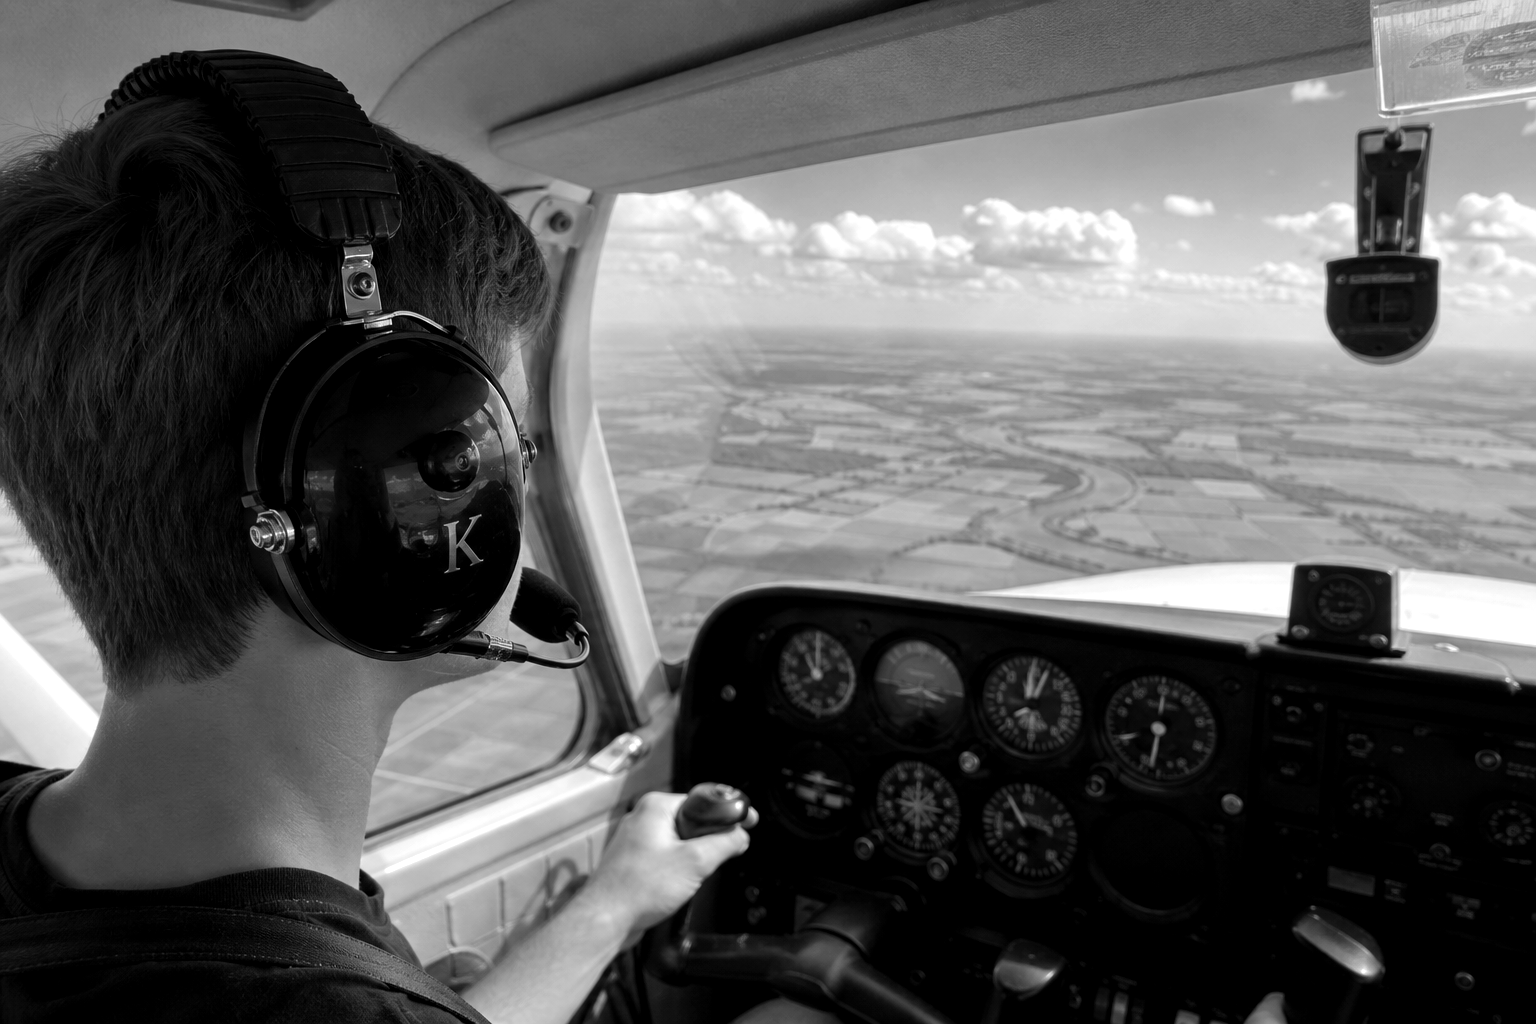
1. The First 20 Minutes Feel Overwhelming
Between the run up, departure call, activating your flight plan, setting up flight following, and spotting your first checkpoint, the opening minutes of a cross country flight feel like a firehose. This is completely normal. Once you pass your second checkpoint and settle into cruise, the workload drops and flying becomes enjoyable.
2. Tell ATC You Are a Student Pilot
When you call approach or center for flight following, add "student pilot" to your initial call. Controllers hear it every day. Most will slow down, simplify their instructions, and give you a little extra patience. This is smart piloting, not a sign of weakness.
3. Spotting Checkpoints Is Harder Than It Looks
That lake that looked obvious on your sectional chart? It looks exactly like every other lake from 4,500 feet. Pick checkpoints that stand out: a bend in a river, a highway interchange, a town with a water tower. Start looking for your next checkpoint before you reach the current one. The goal is to stay ahead of the airplane at all times.
4. Landing at an Unfamiliar Airport
This part makes most students nervous. New traffic pattern, new tower frequency, possibly a different pattern altitude. The trick is simple: brief the airport before you get there. Know the pattern altitude, active runway (from ATIS or AWOS), and tower frequency before you are within 15 miles. If something confuses you, ask the tower. They deal with this every day.
Read more: How to Prepare for the First Solo Flight: Student Pilot Guide
5 Things Nobody Mentions About Your First Cross Country Flight
1. Your Headset Comfort Becomes a Serious Factor
On a pattern session, any headset feels fine. On a cross country flight, you are wearing it for two hours straight. That means two hours of clamping pressure on your head, engine noise hitting your ears nonstop, and ATC calls you need to hear clearly through all of it.
This is exactly why over 30 flight schools across the US equip their students with KORE Aviation headsets. The gel ear seals stay comfortable well past the one hour mark, the build is lightweight enough to avoid neck fatigue, and they never need batteries. When you are flying a 150 nautical mile solo cross country flight and need to focus on ATC communications, ear fatigue and discomfort are the last things you want.
2. Plan Your Fuel Stops Around Restrooms
No textbook mentions this, but it matters. Two hours in a cockpit with no restroom is a long time, especially if nerves had you drinking extra coffee that morning. When picking your fuel stop airport, check the chart supplement to confirm it has accessible facilities. Future you will be grateful.
3. You Will Burn More Fuel Than Your Calculations Show
Wind forecasts are estimates, not guarantees. Your actual cruise altitude might not match what you planned. You might circle a few extra minutes looking for an unfamiliar runway. Always plan with conservative fuel numbers. A good rule for Cessna 172 pilots: budget 10 GPH for cruise even if the POH says 8.5.
4. The Flight Home Is Always Easier
Most first cross country flights are out and back routes. The return leg feels completely different from the outbound. You already know the checkpoints. You already talked to ATC once. The nerves settle, and the flying becomes pure enjoyment. This is the leg where most students remember exactly why they started training.
5. You Will Land With a Smile You Cannot Stop
Flying 150 nautical miles under your own navigation, communicating with new controllers, landing at an airport you have never visited, and then flying yourself home? That feeling is something you will carry with you for the rest of your flying life.
Choosing the Right Headset for Your First Cross Country Flight
Short pattern sessions are forgiving on gear. Cross country flights are not. Here is what actually matters when you are wearing a headset for two hours or more.
1. Weight. Every extra ounce becomes noticeable after the first hour. Heavy headsets cause neck fatigue and pressure spots on the top of your head. Before your first cross country flight, try wearing your headset at home for 90 minutes. You will know right away if it works.
2. Clamping Pressure. Too tight and your ears ache by hour two. Too loose and ambient noise leaks in, forcing you to turn up the volume. The ideal fit is firm enough to seal but comfortable enough to forget you are wearing it.
3. Passive Noise Reduction (PNR). Many student pilots are smart to start with PNR headsets. They use physical ear cup sealing to block noise, weigh less than active models, and never need batteries. For training aircraft like the Cessna 172, a quality PNR headset with 22 to 24 dB noise reduction handles cockpit noise effectively. No batteries to die mid flight and no electronics to troubleshoot.
4. Microphone Clarity. ATC needs to understand you, especially at unfamiliar airports. A noise cancelling electret microphone makes a big difference when the engine is loud and your callsign needs to come through clearly.
Headset Comparison Table for Student Pilots
| Feature | Budget PNR (under $100) | KORE Aviation KA-1 ($224.95) | Premium ANR ($800+) |
|---|---|---|---|
| Comfort on 2+ hour flights | Poor. Foam pads flatten and overheat. | Excellent. Gel ear seals stay cool and soft. | Excellent. Premium padding materials. |
| Noise reduction | Basic, around 18 dB | Strong passive, around 24 dB ¹ | Active + passive, around 30 dB |
| Weight | Light but often flimsy | Light and durable | Heavier due to battery packs |
| Battery required | No | No | Yes (AA or rechargeable) |
| Microphone type | Basic electret | Noise cancelling electret | Noise cancelling electret |
| Warranty | 90 days or none | 5 years ² | 5 years (varies by brand) |
| Flight school adoption | Rare | 30+ schools across the US ³ | Rare (too expensive for bulk) |
| Best for | Very short flights only | Training, cross country, solo | Professionals and frequent flyers |
| Price range | $50 to $90 | $224.95 | $800 to $1,200 |
The Bottom Line
Your first cross country flight is one of the biggest milestones in flight training. You will need the right documents, a solid navigation plan, and comfortable gear that can handle 2+ hours of cockpit noise. Pack your bag the night before, file a VFR flight plan, and brief your destination airport before arrival.
If you are borrowing your school's headset or using a budget option from Amazon, your first cross country flight will be the flight that convinces you to upgrade. The good news is that you do not need to spend $1,000 to get a headset that performs.
The KORE Aviation KA-1 delivers gel ear seal comfort, clear ATC communication through a noise cancelling microphone, and a 5 year warranty, all at $224.95. Over 30,000 pilots already fly with it, and more than 30 flight schools across the US have made it their official student headset.
Also read: Student Pilot Headset Upgrade Guide: When to Move Up
Frequently Asked Questions
1. How far does a cross country flight have to be?
Under FAA rules, a cross country flight must include a landing at a point more than 50 nautical miles from your departure airport for it to count toward your Private Pilot License. Your long solo cross country flight must cover at least 150 nautical miles total with three points of landing.
2. Can a student pilot fly cross country solo?
Yes, but only after your CFI endorses you for that specific flight. Your instructor must review your planning for each solo cross country flight and sign your logbook authorizing the exact route and airports. You cannot change the plan on your own once signed off.
Also read: What Are the Student Pilot Solo Flight Requirements?
3. How many cross country hours do I need for my PPL?
The FAA requires a minimum of 3 hours of dual cross country training and 5 hours of solo cross country time. This includes one long solo flight of at least 150 nautical miles. Most students accumulate more than the minimums by the time their checkride comes around.
4. What should I do if I get lost during a cross country flight?
Stay calm and keep flying the airplane. Head toward a recognizable landmark like a highway or river. If you are on flight following, ATC already knows where you are and can give you vectors to your destination. If you are not on flight following, contact approach or center on the nearest frequency. Your GPS or EFB can also verify your position instantly.
5. What is the best headset for long cross country flights?
Look for a lightweight PNR headset with gel ear seals and a noise cancelling microphone. The KORE Aviation KA-1 is popular among student pilots because it stays comfortable for 2+ hours, never requires batteries, and costs a fraction of premium ANR models. It is backed by a 5 year warranty and trusted by 30+ flight schools.
Your first cross country flight is one of those milestones you will remember for the rest of your flying career. Plan thoroughly, pack the night before, and invest in a headset you can trust for 2+ hours in the cockpit. The KORE Aviation KA-1 was built for exactly these moments.


