

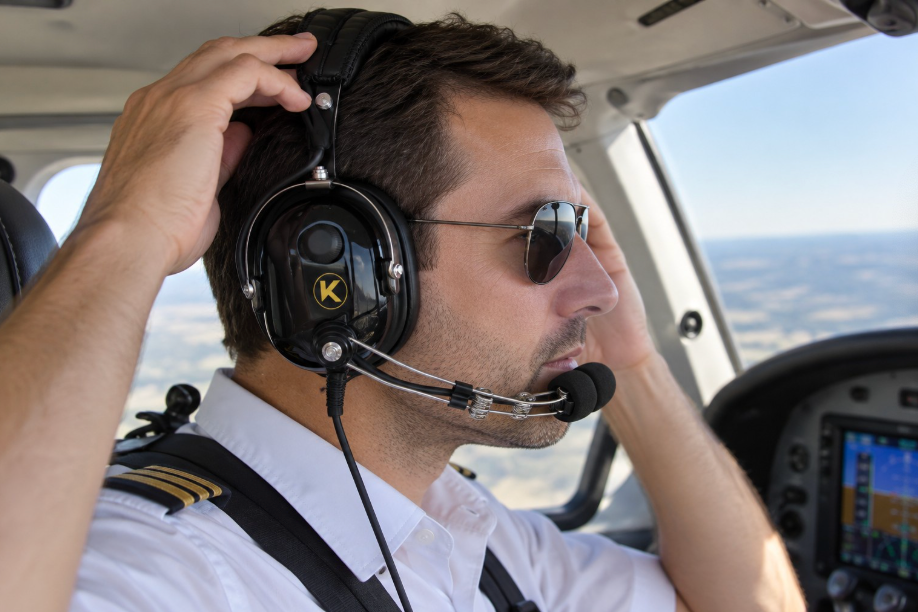
KORE Aviation - Fit is the single most common reason pilots abandon their gear, yet almost nobody explains how to set up an aviation headset fit correctly before stepping into the flight deck. When you are flying a Cessna 172 generating 85 to 95 decibels at cruise and over 100 decibels during run up, your hearing protection depends entirely on mechanical engineering and correct sizing. Without a proper mechanical seal, low frequency engine rumble leaks right past the earcups, degrading both your hearing protection and your radio communication clarity.
Mastering aviation headset fit is not just about comfort during long cross country training sessions. It is a critical safety practice. FAA advisory circulars and occupational health standards warn that unprotected exposure to cockpit noise causes permanent hearing loss over time. A properly fitted headset ensures that passive noise reduction functions at its maximum rated capacity, keeping you alert and focused through hours of flight training.
Why Proper Aviation Headset Fit Controls Cockpit Noise and Clamping Force
To understand why getting your aviation headset sizing right matters so much, you have to examine headset clamping force as the central variable in passive noise reduction. Traditional aviation headsets run roughly 6 to 7 newtons of clamping force. To put that in perspective, high end consumer music headphones usually exert about 3.5 to 4 newtons of force. That extra squeeze is not an accident of bad design. It is required to create the mechanical passive seal that delivers 24 decibels of noise reduction in a loud piston engine environment.
The engineering tradeoff is plain. Less clamp means more initial comfort, but it results in worse noise reduction and a compromised microphone environment because background cockpit roar bleeds directly into the mic boom. On the other hand, excessive headset clamping force creates severe headaches and jaw fatigue over long cross country flights. Finding the exact sweet spot between mechanical attenuation and physical comfort is the core principle of mastering aviation headset fit.
Many pilots make the mistake of assuming that all headsets apply force identically. Entry level options and budget marketplace headsets often rely on rigid, unyielding headband springs that bite into the skull. Premium designs utilize balanced steel springs and multi-position stirrup assemblies to distribute that 6 to 7 newtons of force evenly across the entire ear cushion perimeter. When evaluating an aviation headset fit, you are essentially evaluating how efficiently the manufacturer converts spring tension into an airtight acoustic seal without causing localized pain points.

The Four Core Variables of Aviation Headset Sizing
Achieving the correct aviation headset fit requires balancing four distinct mechanical variables. If any one of these four elements is out of alignment, your overall comfort and acoustic seal will degrade rapidly during your flight.
First is headband length adjustment. Both sides of the headband must be extended or retracted evenly so the center of gravity remains directly over the crown of your head. If one side is adjusted longer than the other, the earcups will twist, creating an uneven seal and a pressure hot spot on one temple.
Second is earcup vertical position on the stirrup assembly. The stirrups allow the earcups to pivot and slide up or down independently, ensuring the cushions completely surround your ears rather than resting on top of the cartilage. If the earcups are positioned too low, the bottom of the cushion presses hard against your jaw hinge. If they are positioned too high, the top of your ear gets pinched against the speaker housing.
Third is headband tension. This determines how firmly the headband presses the earcups against your head. Fourth is ear seal contact area. The entire perimeter of the ear cushion must rest flat against your skin with zero gaps, especially near the jaw hinge and behind the temple where facial contours curve inward.
Step by Step Guide to Perfect Aviation Headset Fit and Sizing
Setting up your gear properly takes less than two minutes on the ramp before engine start. Knowing how to properly adjust aviation headset headband components before engine start prevents mid flight fatigue and ensures optimal performance.
- Set the headband length so the top pad rests securely on the crown of your head, not forward on your forehead. Both sides should click into matching notch positions to maintain symmetry.
- Slide the earcups up or down on the stirrups so your entire ear sits fully inside the seal cavity with zero contact on your outer ear cartilage.
- Check for air gaps around the jaw hinge and where your sunglasses or prescription glasses arms enter the earcup perimeter.
- Wear the headset for twenty minutes on the ground during preflight checks and engine run up before you depart. This allows the ear seals to conform to your facial structure and body temperature.
Executing this procedure consistently prevents mid flight adjustments that distract you from cockpit checklists and traffic scanning. Taking twenty minutes on the ramp to verify your aviation headset fit pays off exponentially once you enter busy controlled airspace.

Head Shapes, Glasses, Hair, and Common Sizing Challenges
Human anatomy introduces several physical variables that complicate aviation headset sizing in real world flying conditions. Pilots with narrow head shapes often experience excess clamp because the headband spring steel is designed for average adult dimensions. Conversely, pilots with larger heads find themselves at the absolute end of the adjustment range, causing the earcups to pull inward at an angle and break the lower seal.
Hair volume creates another hidden obstacle in aviation headset fit maintenance. Long hair and ponytails create channels where ambient cockpit noise leaks directly under the ear cushion. Tying hair low at the nape of the neck or tucking it completely outside the seal resolves this acoustic leak instantly. Hats and baseball cap brims also interfere with headband placement. If you wear a cap, ensure the adjustment strap or button does not push against the center of the headset headband, which creates an immediate pressure hot spot on your scalp.
Glasses require special attention during your preflight setup. Eyewear temple arms break the acoustic seal of standard ear cushions, letting in high frequency wind and engine noise while causing localized temple pain. For a detailed breakdown on managing eyewear, read our guide on wearing glasses with aviation headsets.

Troubleshooting Common Fit Failures: Hot Spots, Jaw Pain, and Slippage
Even experienced pilots encounter fit failures when switching aircraft or embarking on long cross country flights. Recognizing the exact symptom allows you to apply the correct mechanical fix immediately.
Hot spot on the crown: If you feel a sharp ache at the top of your head, the headband is resting too far forward on your forehead or bearing too much dead weight. Shifting the headband half an inch forward or backward on your scalp distributes the load across a wider surface area.
Pressure pain on the jaw hinge: If your jaw aches after an hour of flying, the headset is either clamped too tightly or the earcups are tilted at an incorrect angle. Adjust the stirrup pivot points so the bottom of the earcup matches the natural angle of your jawbone.
Headset slipping forward in turbulence: If your headset drifts during moderate turbulence, your headband length is likely adjusted too loose, forcing the earcups to act as a fulcrum. Retract both sides of the headband by one notch to lock the crown pad firmly against your scalp.
Diagnosing these fit failures quickly prevents minor discomfort from escalating into severe distraction while flying IFR or managing busy traffic patterns. When your aviation headset fit is dialed in correctly, you forget you are wearing hearing protection altogether.
Gel Ear Seals: The Cheapest Comfort Upgrade
If you are struggling with a rigid aviation headset too tight setup, the cheapest and most effective upgrade you can make is swapping out stiff foam ear cushions for silicone gel seals. Standard foam cushions compress and push back with rigid resistance against your jaw and temples. Silicone gel ear seals conform fluidly around facial contours, glasses frames, and jaw hinges.
By distributing clamping pressure evenly across a wider surface area, gel seals eliminate pressure points while improving passive noise attenuation. For $16.99, upgrading to the KORE Silicone Gel Ear Seal transforms a budget marketplace headset or standard trainer gear into an all day comfortable flight deck companion. If you want a complete headset package featuring premium gel ear seals right out of the box, the KORE KA-1 General Aviation Headset delivers 24 dB PNR and exceptional durability for $224.95.

Headset Fit Troubleshooting Reference
| Symptom | Root Cause | Corrective Action |
|---|---|---|
| Sharp ache on top of head | Headband resting on forehead or uneven weight | Shift headband half an inch on scalp and balance sides |
| Jaw hinge pain after 1 hour | Excessive clamping force or incorrect earcup tilt | Adjust stirrup angle and upgrade to KORE Silicone Gel Ear Seal |
| Low frequency engine roar leaking in | Broken seal from hair, glasses, or uneven adjustment | Check ear cushion contact area and tuck hair away |
| Headset slides forward in turbulence | Headband extended too long | Retract headband by one notch on both sides |
To experience true passive comfort and reliable 24 dB noise reduction on your next cross country flight, equip yourself with proven student pilot gear. The KORE KA-1 General Aviation Headset features premium gel ear seals and dual GA plugs right out of the box.
Frequently Asked Questions
1. Why does my aviation headset feel too tight after an hour of flying?
Traditional aviation headsets exert 6 to 7 newtons of clamping force to maintain a passive acoustic seal against engine noise. Over time, this pressure causes fatigue. You can relieve discomfort by adjusting the headband tension, shifting the crown pad, or upgrading to silicone gel ear seals that distribute pressure more evenly.
2. How do I know if my aviation headset fit is correct?
A correct aviation headset fit means your entire ear is enclosed inside the ear cushion cavity without touching the inner foam or speaker screen. The headband should rest evenly on your crown, and you should feel zero air gaps around your jaw or temples during preflight engine run up.
3. Can I adjust the clamping force on my aviation headset?
Yes, most metal headband aviation headsets allow you to gently flex the spring steel band outward to reduce tension or inward to increase it. Make small adjustments incrementally and test the fit on the ground before flying.
4. Do glasses interfere with aviation headset sealing?
Yes, rigid glasses frames create tiny gaps in the ear cushion seal, allowing cockpit noise to leak into your ear. Flexible temple frames and silicone gel ear seals help minimize noise leakage around eyewear.
5. Why are silicone gel ear seals better than standard foam?
Silicone gel ear seals mold smoothly around facial contours, earrings, and glasses frames. They distribute clamping force across a larger surface area, eliminating hot spots and improving passive noise reduction compared to stiff foam cushions.
Bottom Line
A proper aviation headset fit should create a consistent seal around your ears without causing distracting pressure on your head, temples, or jaw. Before flying, adjust the headband and earcup position, check for gaps around glasses or hair, and make sure the headset stays secure without excessive clamping.
If the headset fits correctly but still becomes uncomfortable on longer flights, worn or stiff ear seals may be the problem. Replacing them with softer gel seals can improve pressure distribution and help maintain the passive acoustic seal.
For pilots who prefer gel ear seals from the start, the KORE KA-1 combines silicone gel seals with 24 dB passive noise reduction and adjustable earcups for everyday GA and flight training use.
Ultimately, the best headset is not simply the one with the highest noise-reduction rating. It is one you can fit correctly and wear comfortably throughout the flight.


